
Baking


Vegan and Sugarfree Layered Blueberry 'Cheesecake'
I'm always experimenting with vegan and especially sugar-free baking- blogs such as Deliciously Ella and My New Roots are my main inspiration. I had a pack of silken tofu which needed using up so I created this recipe for a layered blueberry 'cheesecake' topped with a blueberry and chia seed jam. The silken tofu gives it texture but the coconut milk and frozen blueberries gives it its delicious flavour.
Soak 1 1/2 cups raw cashews in water overnight.

Blueberry and Chia Seed Jam
- 3 cups of blueberries- I used frozen.
- 3-4 tbsp maple syrup
- 2 tbsp chia seeds
- 1/2 tsp vanilla extract

- Bring blueberries and maple syrup to the boil, stirring frequently. Reduce heat and simmer for around 5 minutes. Mash the blueberries slightly. You want some texture so leave some whole.
- Stir in chia seeds and continue simmering until it thickens and becomes jam-like.
- Remove from heat and stir in the vanilla extract.

To make the base:

- 1/2 cup raw almonds
- 2 cups oats
- 1/2 tsp cinnamon
- 1/4 tsp sea salt
- 1/4 cup coconut oil
- 2 tablespoons maple syrup
- approx 1 1/2 tablespoons of water
- Preheat the oven to 200 C. Grease an 8-10 inch tart or cake tin. I used a push-pan. Cut a circle of greaseproof paper to line the base of your tin.
- Process the almonds in a food processor until they resemble crumbs. Add oats, cinnamon and salt and process again until it resembles coarse sand. Add oil, maple syrup and water and process once more until you get a dough.
- Press into the base of your pan. Bake in oven for around 15 minutes until turning golden-brown. Leave to cool.

To make the topping:
- The soaked cashews, drained.
- 1 cup silken tofu
- 1/2 cup coconut milk
- 1/3 cup agave nectar/ maple syrup
- 1 tbsp lemon juice
- 1 tbsp cornflour
- 1 tsp vanilla extract
- 1 cup fresh/frozen blueberries

- Turn down the oven to 175 C
- Blitz the cashews until you get a thick paste. Add the remaining ingredients apart from the blueberries and process again until smooth- don't worry if it seems quite grainy at this point.
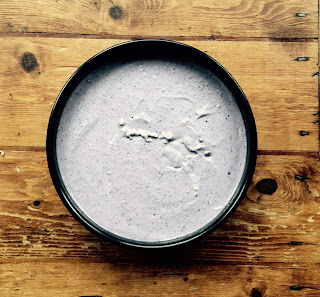
- Pour half of this mixture on top of the base. Then process the remaining mixture with the blueberries- adding a few more blueberries if you want a darker colour. Pour this lilac mixture on top of the white mixture. Bake for around 40 mins until you get a slight wobble but an inserted skewer remains clean. Leave to cool. I put mine in the fridge for about an hour.

Top the cheesecake with the blueberry and chia seed jam and leave to set. Top with fresh blueberries before serving and enjoy.


This was absolutely delicious x
ReplyDelete